How To Stop Leaking Garden Hose Connectors?
Are you wondering how to stop leaking garden hose connectors? A garden hose is an essential component of every garden. Garden hoses may use for many gardening tasks in addition to providing irrigation water.
It cannot operate alone and need many garden hose fittings to perform correctly. Garden hose fittings are necessary accessories that may include with your hosepipe or be bought separately.
Hose connectors are among the essential garden hose fittings. The size of your garden hose directly dictates the size of your hose connection. The bigger the garden hose, the more water it provides at a lower pressure. Garden hoses typically vary in diameter from 3/8 inch to 34 inches.
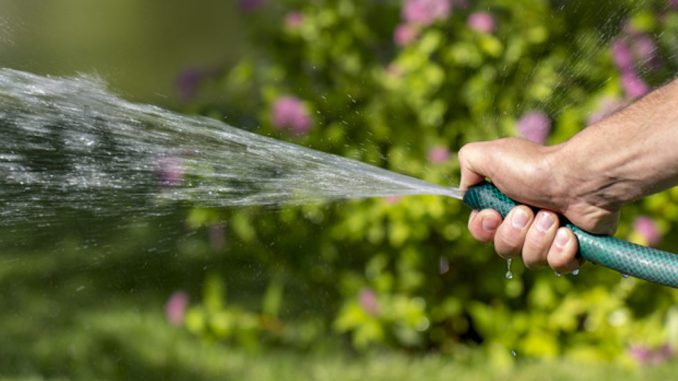
Garden hose connectors are used for connecting the garden hose to the water source, which might be a tap or faucet. They are also helpful for connecting a wand or spray nozzle accessories to the hose.
To determine the correct hose connection size, use a tape measure to measure the distance between the inner walls. Take care not to measure the distance between the exterior walls since the measurement will be big.
Garden hose connectors, on the other hand, are a catch-all word for the numerous garden hose fittings. To begin with, if your hose is leaking, you should not be in a rush to dispose of it. Use the numerous less expensive techniques to repair your hose before throwing it away.
Determine the precise location of the leak in your garden hose after you’ve located it. Most leaks are repairable, and this post will show you how to stop leaking garden hose connectors. Try the instructions below before purchasing another one.

Why Does Garden Hose Connector Leak?
If not fixed promptly, a leaking hose line wastes a large quantity of water. Water will continue to trickle all day until you patch the leak. If you understand the causes of the leak, you will be able to respond promptly and take the required procedures to stop the leak.
The following are the most typical causes of leaky connections:
1. Loose Fitting Of The Connectors
After a lengthy period of usage, the connections often get loose. Otherwise, it might be due to low water pressure or other factors. Furthermore, the gaskets might wear out or become missing, which has a significant impact on the connections.
Gaskets are constructed of rubber and are excellent for sealing any joint between two surfaces. They are required to prevent hose connection leaks.
2. Loose Packing Nut Of The Faucet
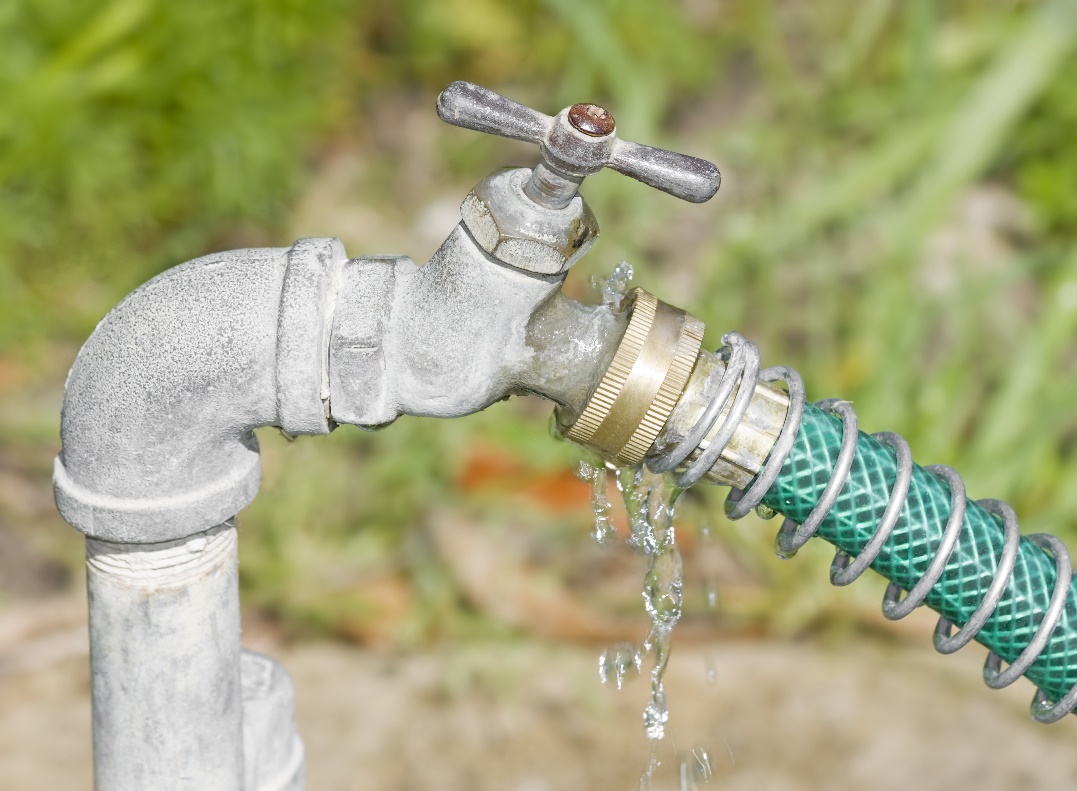
If you look closely at your garden hose line, you will see a faucet attached to the connections with a packing nut. Faucets link the hose line to the water supply. The faucet may leak if the nut connecting the faucet is not tight enough.
3. Worn Out Hose End Fittings
Hose end fittings often wear out, causing leaks in the hose connection. It is due to the temperature variations over the winter and summer. Water on the pipe often freezes in the winter, and the increased volume exerts pressure on the inner surface, harming the hose end fittings.
How Do You Stop A Faucet Hose Connector Leak?
Purchase a rubber hose seal from your local hardware shop or online. Purchase a pack of these since they are inexpensive and helpful.
Rubber hose seals (also known as garden hose washers, gaskets, or O-rings) are circular and roughly an inch wide. New hoses have new seals, but yours may have dissolved or fallen out when you removed the line for the winter.
Turn off the water (to prevent cold water spraying everywhere), detach the hose from the faucet, and inspect the interior. If you still have a gasket or part of a gasket in there, use a flat head screwdriver to pry it out.
Examine to see whether the old O-ring came out smoothly. If there are any little rubber particles remaining in the hose, remove them. Then insert the new one. Push it down until it’s firmly in place. Make sure it’s not at an angle in there; you may need that screwdriver’s assistance.
However, if you use a screwdriver, be careful not to damage the new gasket. A little dishwashing detergent around the edges should do the job if your gasket is stubbornly refusing to go into the hose.
Hose seals should not be able to slip out on their own. If yours does, you may need a larger size.
Some people recommend wrapping white plumber’s (or Teflon) tape around the faucet’s threads. Before screwing in the new gasket and hose, cover the threads with the plumber’s tape. Wrap in the same way that you will screw in the hose – clockwise.
How To Stop Leaking Garden Hose Connectors?
The first step in resolving this issue is to replace the gasket. To achieve a better solution, you must seal it with an O-ring. If it did not provide the desired results, you may want leak-proof garden hose fittings right away.
This notion of a leak-proof garden hose introduced you to a new age. Water Stop technology includes in the female brass hose connector. There will be nothing to worry about when you have tightened it up.
The connection you are currently utilizing may break due to frequent warping. If it is coming from one of the female or male end connectors, you must pay attention to its state.
If the female end connection spilled and you’ve previously replaced the leaking washer or rubber grommet associated with that connection.
When tightening the hose to a male faucet or postal hose connection, the female connector might leak slightly beyond where the female half twists on the brass collar. That is possible because the female connection is not tightened to the washer inside its housing.
You can sometimes tighten it, but threads on the male connector may have been cross-threaded at some stage. As a result, the female connection is not fully inserted.
You may be able to tighten further using a pair of channel locks. That will either knot the male connector and halt the leak or replace the male or female connection that is cross-threaded or not attaching all the way.
If it does not work, you must go to the next step. If you still notice a problem in the connector’s joint, whack off that end.
How Do You Fix Hose Leaks?
Small leaks may repair using electrical tape. Wipe down the hose so, it’s clean and dry where the leak is. Then, take a piece of electrical tape and wrap it around the leak several times.
If the leak is more than a pinhole, you may need to buy a hose mender. Compression fit hose menders are available for purchase at your local hardware, garden supply, or internet shop.
Locate and label the hose gash using a waterproof pen. Then, using a utility knife, cut out the gashed area. Take it to your local hardware shop and put it through its paces. Most hardware shops will gladly assist you.
First, read the instructions or watch a video lesson on how to use the mender. After that, turn off the water. Check that the hose gash area is dry. Using a sharp utility knife, cut off the gashed piece. The hose mender should then be installed.
If the replacement hose parts just won’t fit, try rubbing some dishwashing detergent around the exterior.
How Do I Fix A Hose Nozzle Leak?
Hose leaks at the nozzle are often repaired by installing a new gasket or O-ring within the nozzle. Alternatively, try the plumber’s tape method.
If you don’t have any replacement rubber gaskets or plumber’s tape on hand, you might try another method before going to the hardware shop. A rubber band will be required.
Twist a medium-thick rubber band around the exterior of the male hose, below the hose threads, thrice or so. Screw in the nozzle after pushing the rubber band down.
Can You Tape A Leaking Garden Hose?
If your garden hose is leaking, you may be able to temporarily repair it using tape. First, use a cloth to wipe the area surrounding the leak. Then, apply a layer of duct tape to the leaking area.
Make sure to overlap the tape’s edges so that the whole leak is covered. If the leak persists, apply another layer of duct tape. It may need to repeat many times until the leak is completely shut.
Is It Possible To Use Flex Seal Tape On A Garden Hose?
Whether you need to repair a leaking garden hose, you may be wondering if Flex Seal tape would help. Flex Seal tape may use to repair a garden hose, in short. However, there are a few things to consider before applying Flex Seal tape to your garden hose.
First and foremost, clean the area surrounding the leak. It will assist guarantee that the Flex Seal tape sticks to the garden hose effectively. After that, cut a piece of Flex Seal tape slightly bigger than the leak.
Put on your garden hose by smoothing the Flex Seal tape as you apply it to the garden hose. Once the Flex Seal tape is in place, firmly push it down and allow it to dry. It typically takes 24 hours.
When the Flex Seal tape dries, it forms a watertight seal that stops the leak. Flex Seal Tape is an incredible alternative if you need to repair a leaking garden hose quickly and easily. Clean the area surrounding the leak and smooth out the Flex Seal tape as you apply it.
Maintaining Your Garden Hose
Though a hose connection may be simply repaired, it has an impact on your gardening pleasure and makes the situation difficult.
It is preferable to maintain the hose properly and take appropriate measures to prevent it from any damage that results in water leaking.
Protecting From Temperature Fluctuation
As previously stated, temperature fluctuations play an important part in causing a leak on the hose connection. In the summer, UV radiation may harm your hose if it is left out in the sun. In the winter, however, frozen water pressurizes the couplings, weakening the hose and causing a leak.
Keep your hose away from severe heat or cold. You may store them inside your home or in the garage, which is a secure location for hose storage.
Using A Hose Cart
Hose carts are handy for transporting your hose from the garage to the garden. Without a hose cart, the hose may get entangled in any sharp item or equipment on the route to the garden, causing damage to the pipe and connections. Bundle your hose into the cart using hose reels to guarantee good maintenance.
Replacing The Washer
Most of the time, the hose washer is the source of the leak, and it cannot always be repaired owing to its design and construction. If you discover a problem with the washer, don’t wait to repair it before it causes more complex issues that are difficult to resolve.
Removing Excess Water
When storing the hose for an extended period, remove any excess water and thoroughly dry it. If water stays, the connections may corrode and become damaged. You may also detach all of the hose’s attachments before storing them. It increases its durability, and you will discover that it still works well after being unused for months.
Final Words
A garden hose connection enables you to utilize the hose for many purposes. It comes in helpful in every duty, from watering the lawn to washing automobiles. However, when it begins to leak, you lose productivity and it may look irritating.
So, to help you out, I’ve provided three techniques for repairing a leaky garden hose connection. The procedures are straightforward and will just take a few minutes to complete. Furthermore, the Teflon tape and O-rings are inexpensive. As a result, the process of repairing leaks on your garden hose connection saves time and money.