
Easy Steps To Build A Patio On A Slope
Are you thinking to build a patio on a slope? Actually, it is not as difficult as many believe. The project’s most complex and challenging element will be gaining access to your yard to begin building. Still, if you can get that far, you won’t have to worry about what comes next.
Sloping yards are a challenge for most homeowners who want to install a paver patio or any outdoor living area since the slope often causes drainage issues.
If the ground slopes downward, water will accumulate on one side vs. the other. The good news is that solutions exist!
Today, we’ll go over five methods by which you may design your perfect patio, even if your property has some uneven ground and drainage issues. Each solution has advantages and disadvantages, but you may discover one that meets your requirements.
Methods To Build A Patio On A Slope Yard
Here are some tips on how to build a patio on a slope of your backyard.
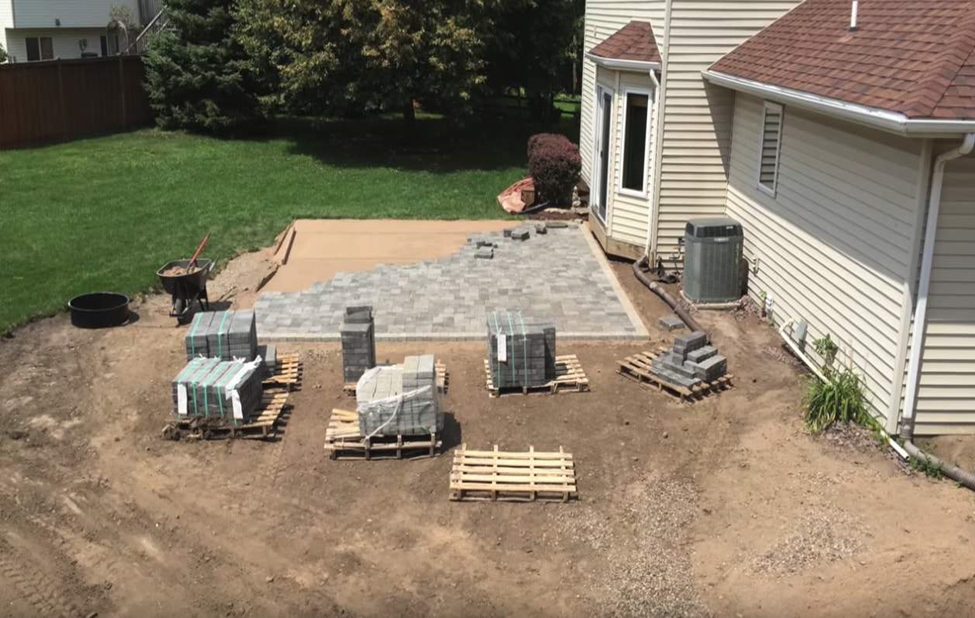
1. Sloped ground
The ground slopes down from left to right here. If you want a patio in your backyard, you’ll have to carve off a level space or lay a slab on top of the slope and then build up with bricks around it.
Many people object to this since it necessitates eradicating existing vegetation before construction can commence.
Many options include retaining walls and terraced patios with steps/stairs that need less excavation but take more time and resources to build.
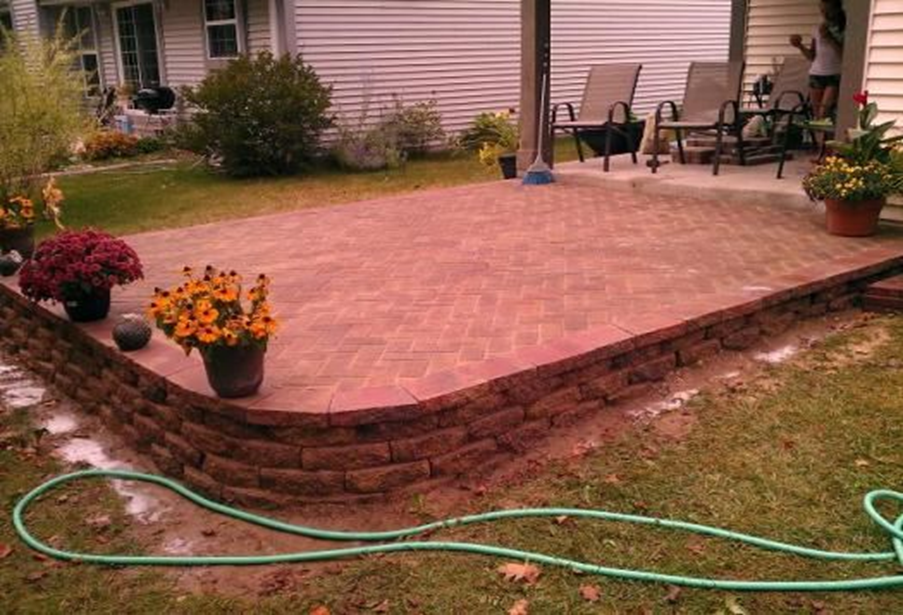
2. Retaining Walls
Building a retaining wall along the downhill portion of your yard can assist with drainage if you have certain regions gently sloping downward towards other steeper sections below them.
If your yard slopes down on both sides and water runs down the upper side while collecting towards the bottom of the slope, this is a suitable option.
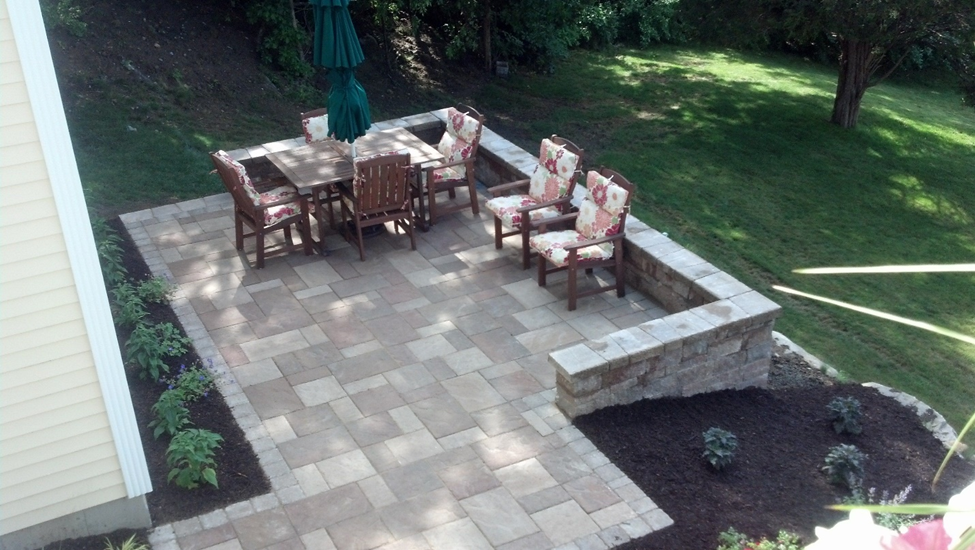
3. Terraced Patios
It may achieve by constructing underground steps or stairs for a more gradual shift in level.
The top platform of each step must be large enough for you to walk around comfortably. Therefore, it is crucial to consider how high and wide they will be.
Materials such as brick pavers (or stone), concrete, bricks, flagstone–whatever kind you prefer–should be utilized.
Terrace patio options are popular because they need less excavation and take little time to build.
4. Steps/stairs
It is the best choice for a sloping yard since it has the most gentle decline of the three options, making it more straightforward to move on.
If you are utilizing steps or stairs instead of earth and retaining walls for your slope, they must be more comprehensive than the step below to allow things to pass through.
Remember that if your drainage issue was caused by water collecting at the bottom of a slope, installing steps would redirect flow away from that region and towards other areas where moisture may gather.
As a result, ensure that the slope is moderate enough and has a low enough gradient to prevent this issue.
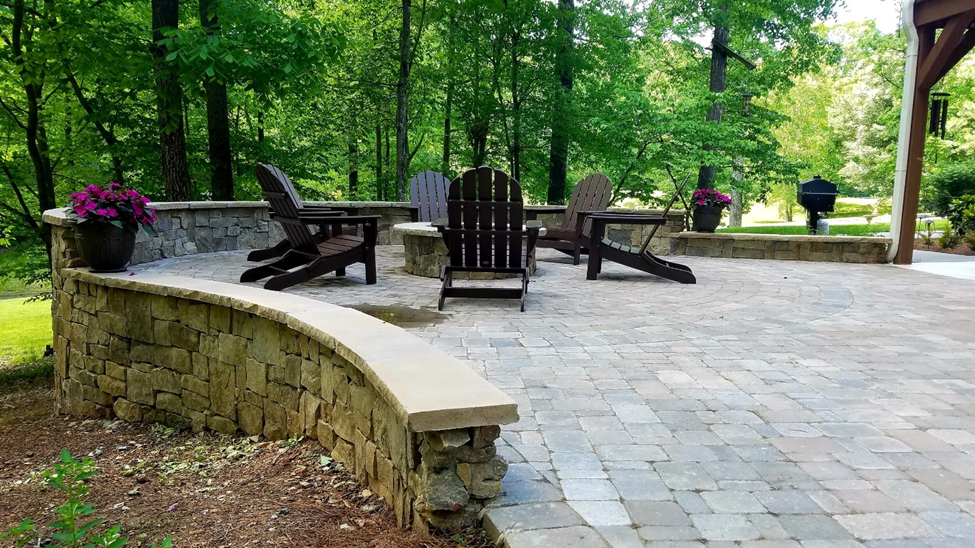
5. Risers (or ledges)
Risers or ledges, which are horizontal surfaces erected between each step toward one side of it, frequently at an inclination, may be used to finish sloping terrain.
They support the materials on top, such as concrete pavers, stone slabs, and bricks–whatever you’re utilizing!
Installing them will assist in distributing weight uniformly, reducing the possibility of erosion from rain/snow runoff over time.
Because they go up against the material surface utilized and where water drainage happens while going downstairs, you’ll need access to all sides to install them.
If your residence does not have such access, another form of the wall may be required.
Steps: For Building A Paver Patio On A Sloped Yard
Layout Patio Size
Detect the position of your patio with a garden hose and thread. Stretch the hose from one end of your yard to the other, then put the string down its length at roughly 18-inch intervals; this is a rough estimate of how far paver bricks are separated when set together.
Mark the position of any trees or huge boulders in that area with stakes, so they don’t get covered up or destroyed during construction.
If unsure about the size of your patio, measure the width of the intended paving stones (typically twelve inches wide) on graph paper and cut it into squares. Matching them to ensure a good fit before laying down your final dimensions. You may also utilize a patio company’s pre-drawn design for this.
Excavate
Excavate the land where your patio will go, using any excavation equipment on hand to remove all of the debris there.
Make it deep enough that you may stack two paver stones on top of each other with room between them; this is known as a “riser.”
If required, use a sledgehammer and stake to make huge boulders fit back into a position where they were before digging began.
Use an excavator or other heavy gear to remove obstinate obstructions, such as rocks or trees, that may prevent rainwater from properly draining and accumulating around your property during storms.
Lay A Base
Prepare the space where your patio will go by adding a layer of gravel for drainage. Make sure it’s around two inches thick, or whatever thickness is indicated by the firm from whom you acquired this material.
Furthermore, ensure they can provide proper advice on how deep to dig before putting it, as well as whatever sort of soil to use! Cover with earth once more (this time using healthy topsoil) and rake until level.
Lay Pavers
Before commencing this operation, ensure the pavers are level and have adequate space for drainage. Have enough blocks on hand, so you don’t run out in the middle.
Continue to add layers until you reach your suitable height. Stepping or jumping on any paver bricks may result in damage.
Fill each hole with soil, then rake it again until it is equal. To prevent injuring roots later while constructing over, remove any pegs identifying trees and other barriers ahead of time.
I suggest waiting two to six weeks after completing steps one through four before staining your paver patio.
The following are the procedures to build a patio on a slope:
- Use twine and hose to mark the area where you will construct.
- Prepare the ground for pavers by excavating it with the proper equipment
- Create a drainage layer of gravel.
- Dig holes equal in size and distance from one another.
- Place pavers one by one until the required height is attained, then fill each hole with earth and rake once more.
- Allow two to six weeks following completion before applying the sealer or paint.
Can You Build A Patio On A Slope?
Yes, you can — and the best thing is that building a patio on a slope is not prohibitively costly.
It would help if you had simple equipment like shovels, wheelbarrows, levelers, and pry bars. Concrete pavers are a popular patio material that is easy to install but will need heavy gear if your slope is severe.
If this seems like something you’d want to try, here are some guidelines:
- Determine if your garden has enough room for new paving stones; if not, add them to an existing part of the garden that does not currently have any landscaping.
- Ensure that the soil slopes away from buildings and roadways so that water does not provide a pool below
- Using stakes or hose pipes, mark your patio space on a slope prepared for paving stones.
- This will ensure that you have enough room for each stage of the method; keep in mind that these measurements must be taken from the ground up, so subtract any existing route from your measurement.
- Your new patio should extend one foot beyond where you want paving stones on each side.
What Should The Slope Be On A Patio?
A sloping patio should have a slope of 1/8 inch (3mm) for every running foot. Slabs 4′′ (100mm) thick and put 2′′ above the ground are often enough.
Slopes steeper than 45 degrees will require using a retaining wall to keep the slope from becoming excessively steep.
Retaining walls are commonly composed of concrete or stone. However, any material may be used as long as it meets regulatory standards and constraints.
Conclusion
After completing all these stages, you could construct a patio on a slope. It’s demanding but rewarding. Take out the grill, arrange the patio chairs, and relax.